A winged tulip is two patterns in one pour. A rosetta base poured wide so its leaves wrap the sides of the cup makes the wings; tulip layers stacked through the middle and a clean cut-through finish it.
Attempt this only when your tulip stacks evenly and your rosetta holds its lines. The winged tulip punishes shaky versions of both.
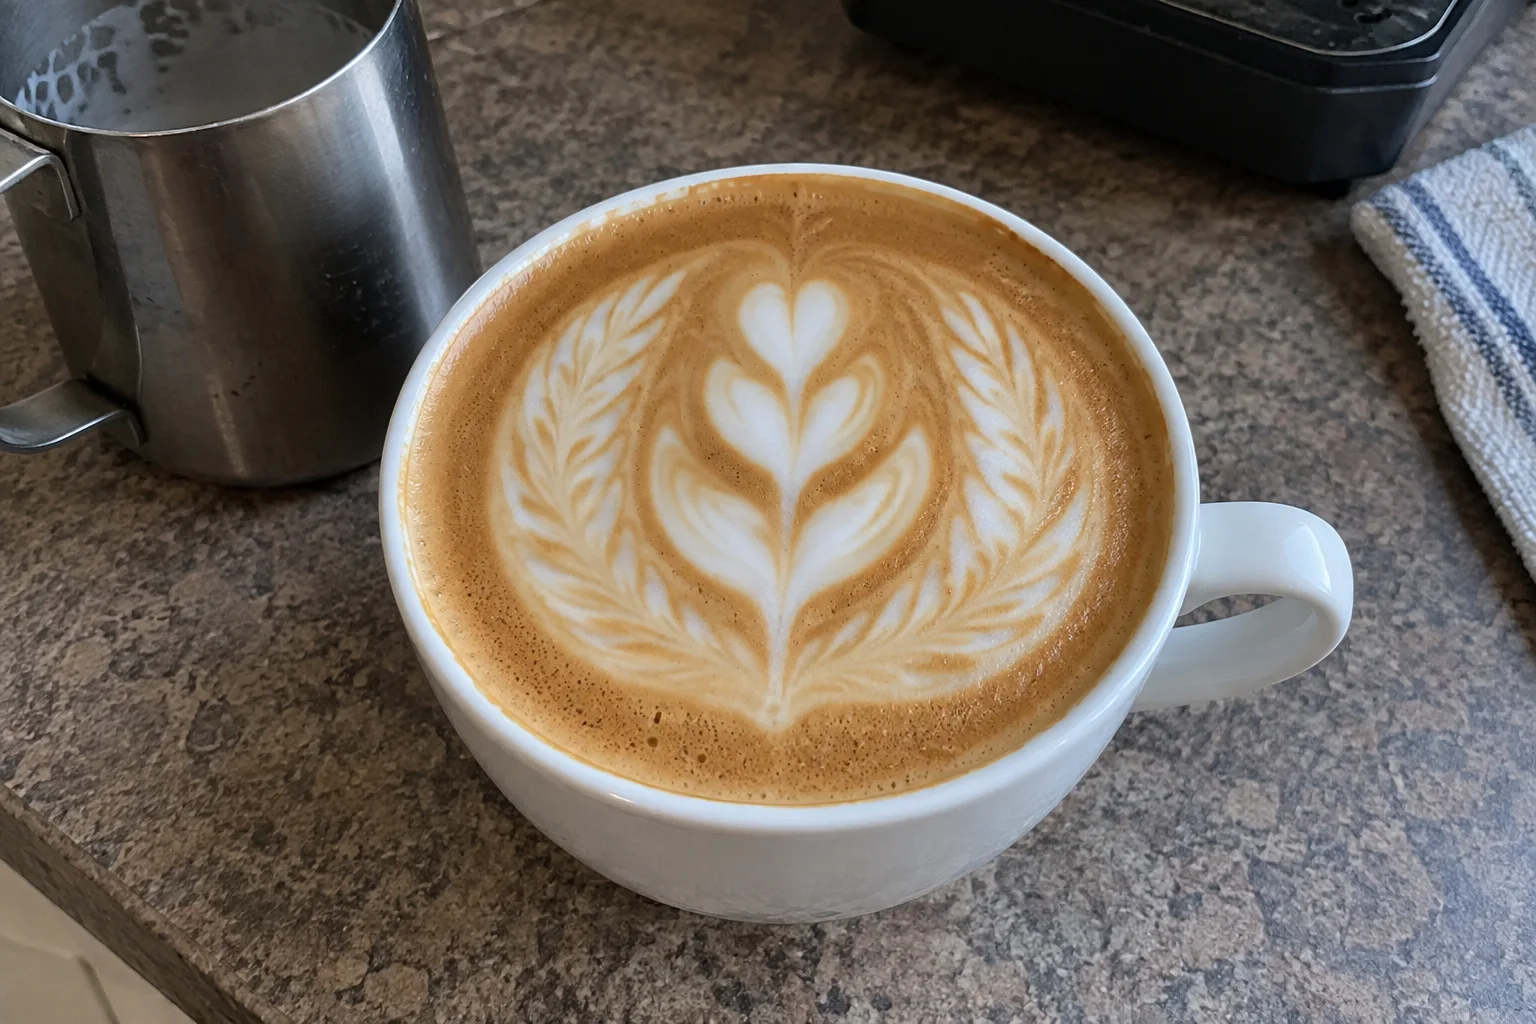
How the wing forms
The wings are a short rosetta poured near the far side of the cup with a wider-than-usual wiggle. As you pull the wiggle back slightly, the leaves spread towards the cup walls and appear to wrap around the space where the tulip layers will sit.
Two things make wings read as wings:
- The wiggle starts far back. Begin the rosetta close to the far rim, not in the centre.
- The swing is wide and slow. Narrow, fast wiggles make a stalk; wide, slow ones make wings.
Step by step
- Set a small base. High pour into the centre until the cup is around a third full, less than for a heart, because this design has many layers to fit. See why base size decides design size.
- Drop low at the far side. Start the rosetta wiggle near the far rim with a wide, slow swing and generous flow.
- Pull back a short distance. Two or three centimetres only, long enough for the leaves to open and short enough to leave room for the stack. Ease the flow off; do not cut through yet.
- Push the first tulip layer. Move to where the wings began, get close, and push a white circle through them. The wings should visibly part around it.
- Stack one or two more layers. Each layer lands slightly closer to you than the last, pushing the previous one forward. Keep the pushes gentle — aggressive flow blows the wings apart.
- Cut through the stack. Lift, thin the stream, and pull straight through all the layers to the near rim. The cut drags the top layer into the classic tulip point.
Where each layer sits
- Wings: far third of the cup, hugging the side walls.
- First layer: on top of the wings’ starting point.
- Middle layers: stacked towards the centre, each one nudging the last forward.
- Cut-through: a straight line from the first layer to the near rim.
Common failures
| What showed up | Likely cause | Try next |
|---|---|---|
| No wings, just a stalk | Wiggle too narrow or started in the centre | Start at the far rim, widen the swing |
| Wings, but no room for layers | Base too big or wings poured too long | Shrink the base; pull back less |
| Layers sink into the wings | Milk too thin or flow too fast on the push | Check texture; slow the push |
| Design explodes outward | Cut-through too heavy | Lift higher, thin the stream |
| One wing bigger | Cup tilted or spout off-centre | Recheck symmetry fundamentals |
A build-up drill
Before attempting the full pattern, pour ten ripple hearts focusing only on a wide, even wiggle starting at the far rim. That wide far-side wiggle is the wing, and it is easier to learn inside a heart than inside a twelve-second combination pour.
Photograph every attempt and note which element failed: wings, stack, or cut. LatteArtist’s per-pour notes make the pattern’s weak link obvious across a week of attempts, so each session works on one element instead of re-attempting the whole thing blindly.