Almost every “why did my latte art fail” question ends here: the milk was either too thick or too thin, and the pour never had a chance.
The good news is you can diagnose it from one pour, and the fix is almost always the same dial — how long you stretch the milk.
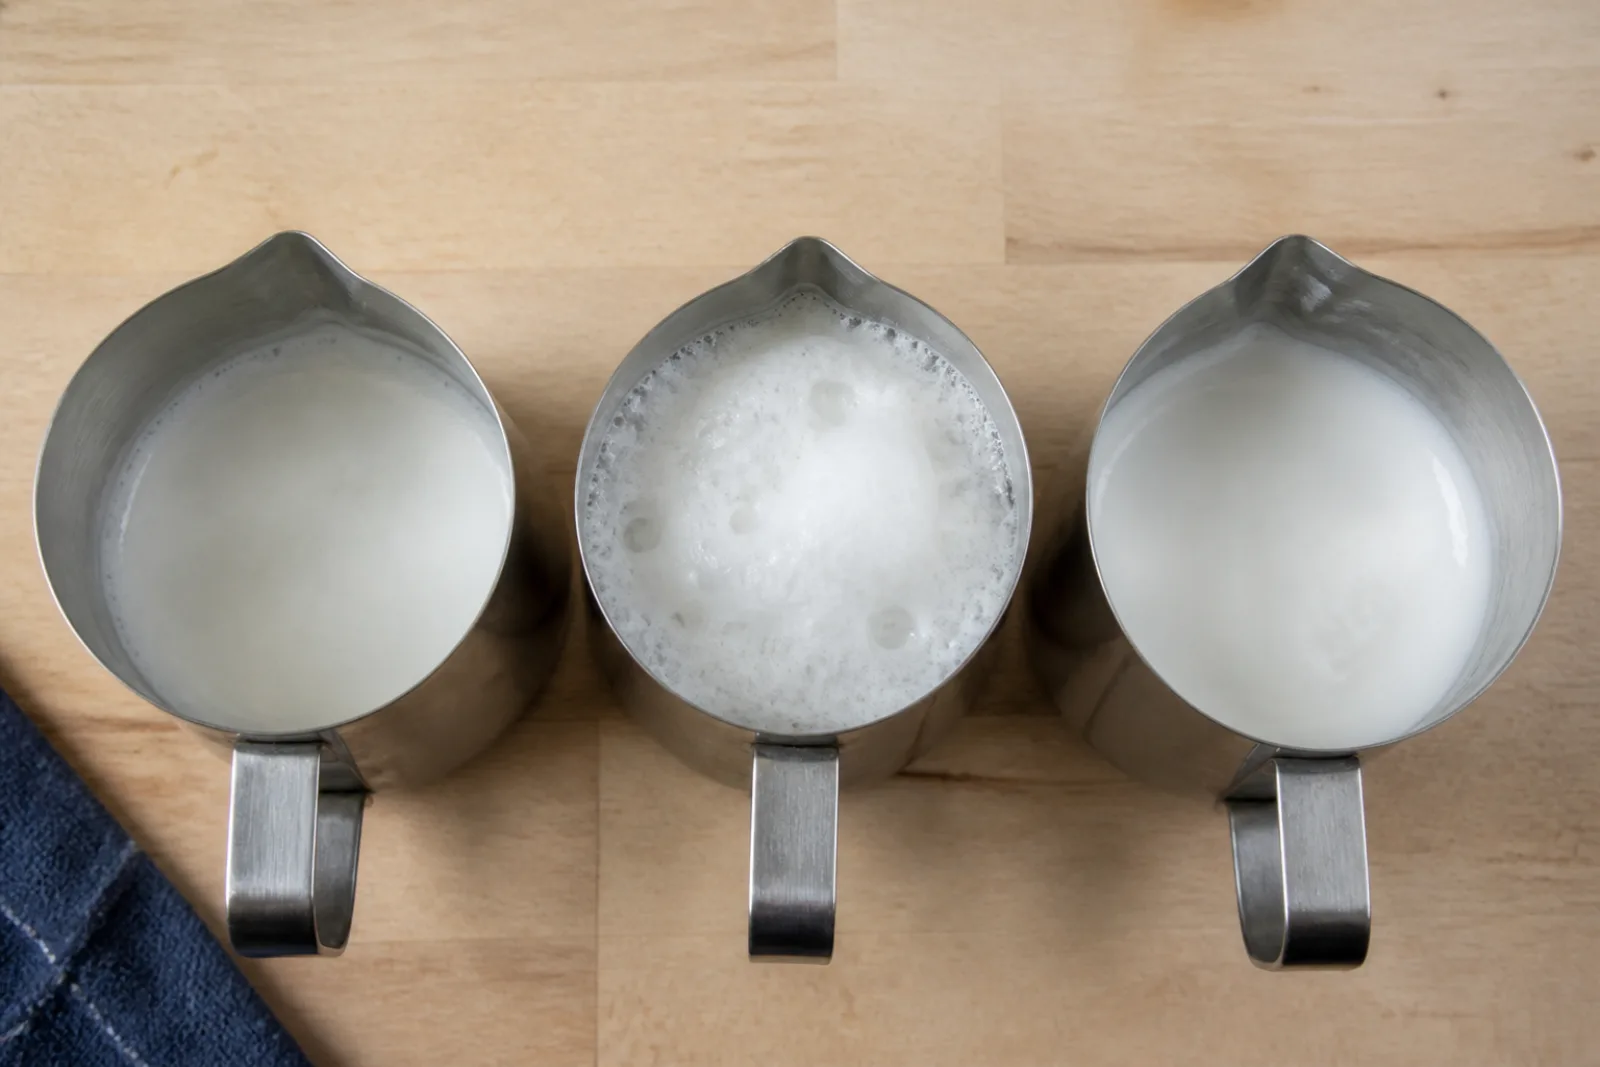
Read the milk in the pitcher
Before you pour, swirl and look:
- Too thick: the milk barely moves when you swirl. A dry, meringue-like cap sits on top. When you pour, foam holds back and then dumps out in a lump — the classic blob.
- Too thin: the milk looks like plain hot milk, no sheen. It pours fast and watery, and any white that appears sinks or washes out immediately.
- Right: glossy, moves like wet paint, no visible cap. White lays on the surface as soon as you get the spout close.
Match the stretch to the drink size
Aeration time is not a fixed number — it depends on how much foam the drink needs and how much milk is in the pitcher. Plant milks need less air again: the oat milk guide covers the adjustments.
| Drink | Rough milk volume | Stretch |
|---|---|---|
| Flat white / cortado | ~120–150 ml | Short — a second or two of paper-tearing sound |
| Cappuccino-style home drink | ~180–220 ml | Medium — a few seconds |
| Large latte | ~250–300 ml | Longer, but still seconds, not tens of seconds |
The larger the drink, the more air you can fold in — but the ceiling is lower than most people think. If you can hear loud slurping for more than a few seconds, you are past it.
Small pitchers are the trap: 120 ml of milk gains volume fast, so a stretch that works for a big latte will give you a jug of dry foam in a small one. Scale the stretch down before you scale anything else.
Too thick: fold it back or start over
If the milk is already too thick, you have two options:
- Fold and tap. Swirl hard, tap the pitcher once on the counter to pop the biggest bubbles, and swirl again. This rescues mildly thick milk.
- Split the pitcher. Pour a third of the foam off into a second jug, swirl, and pour from what remains. Cafés do this constantly.
If it dumps anyway, note it and shorten the stretch next time. Chasing the pour with meringue milk teaches bad habits.
Too thin: it is a steam problem, not a pour problem
Thin milk means the vortex never got going or the stretch never happened — the milk was heated but not textured. Common causes:
- The wand tip sat too deep, so no air was ever introduced.
- The machine is underpowered and you ran out of steam time before any foam formed — see steaming on entry-level machines.
- You stretched, but stopped the vortex early, so the foam sat on top instead of folding in — see what microfoam should look like.
Thin milk can still taste fine, but it will not hold a design. Steam again with the tip nearer the surface for the first seconds.
A one-variable experiment
Next session, keep everything the same and change only stretch time:
- Pour one with your normal stretch.
- Pour one with the stretch cut in half.
- Compare the two photos side by side.
The better one tells you which side of the line you were on. Log the milk, the stretch, and the result so the finding sticks — the practice routine shows a simple way to do that.